Braised short ribs two ways

French-style Asian-style

I have a special place in my heart for beef stew (from fond childhood memories of Chinese beef noodle soup) but braised short ribs are threatening to knock beef stew from its pedestal. Read more of this post

Char siu pork, or Doing what I can about swine flu

In this heightened state of alert, I’m doing what I can about swine flu… which is, basically, not much. Because we as individuals can’t do too much about it besides wash our hands, cover our mouths, exercise, eat healthy, and get enough sleep – all things we should be doing more or less regularly anyway. No, I did my part by cooking up a couple of pounds of pork in the best way I (now) know how – Chinese barbecue style.

There’s meaty American barbecue slathered with thick, nostril-clearing sauce. Stripped down Korean barbecue with its more delicate, sweet marinade. And then there’s Chinese barbecue – the best of both worlds. The sauce is thick, but roasted on so that it caramelizes and becomes a part of the meat itself. It is sweet, yet savory; spicy, yet subtle. The flavors of hoisin, soy sauce, rice wine, ginger, and garlic melt together to create an olfactory experience that is enough to make you pause with amazement but not enough to stop you from devouring piece after piece.

I grew up eating what’s known as “char siu” pork (pronounced more like “chao sao” in Mandarin) but it was never something I thought about making at home. I don’t remember my mom ever making it, though she would often make Peking duck, something that seems much more fancy (but really isn’t, apparently). Char siu pork is like meatballs – a comfort food that is as natural in leftovers as it is freshly made. In fact, I was most used to it as the filling for my favorite snack – char siu bao, or sweet barbecue pork buns – or as a topping for noodle soup. But I always had it pre-prepared in those dishes, and never really saw the original roast it came from.

That changed last weekend, when I suddenly decided I needed to make char siu bao. Ironically, I’m too lazy to drive 45 minutes to the asian market to buy ready-made char siu bao, but not too lazy to go to Safeway down the street and then spend a good 6 hours making the damn things from scratch. So I got a couple recipes to reference for both the bao (buns) and the char siu, and had a good old mashup time of it.

Here’s the eventual recipe I ended up with, adapted from here and here:

For the char siu pork:

  • ~ 3.5 lbs boneless pork shoulder
  • 2-3 cloves garlic, minced
  • ~ 1 T ginger, peeled and minced
  • ~ 1/2 C rice wine or sherry
  • ~ 3/4 C hoisin sauce
  • ~ 1/2 C soy sauce
  • ~ 1/3 C honey
  • a dash of five spice powder

Cut the pork along the grain into long strips 1.5-2 inches wide and about 6-10 inches long. Combine all marinade ingredients, then place with the pork into large ziploc bags. Make sure the pork is coated evenly and then seal, removing as much air as possible from the bags. Marinate in the refrigerator overnight (or at least a few hours).

Place a rack on the lower third of the oven and preheat to 375 deg. Fill a pan (or two, depending on amount of meat) with 1/2 ” water and place a metal rack over it. I used two 9×13″ pans with cooling racks with slats about 1/2″ apart. Arrange the meat strips on the rack(s), reserving the marinade in a small pot.

(I got the roasting times from an Epicurious or Gourmet recipe but I can’t for the life of me find the page again, so here’s my best rememory of it…)

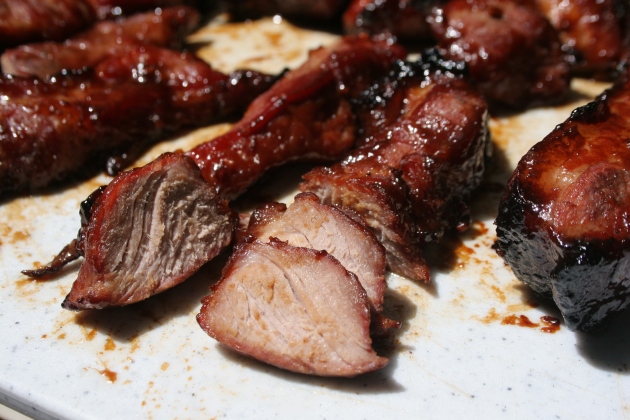
Roast for 15 minutes. Meanwhile, heat the marinade to a simmer for a few minutes, then turn off the heat. Baste the meat with the marinade, then roast for another 15 minutes. Baste the meat generously on both sides, turn meat over, and roast for an additional 20 minutes, basting once or twice in the middle. Turn the oven temp up to 400 deg, baste the meat with the remaining marinade, and roast for about 10 minutes or until caramelized. Place the meat on a cutting board and cover with foil for about 10 minutes. Then allow to cool before slicing or shredding for use in soups, char siu bao, or to eat as is. When you’re done, it should look like this (except try to slice across the grain…):
img_1245

I was pleased with how red the outside of the pork got, since a lot of accounts I read claimed that it was difficult to achieve the vibrant red color you see in the stores. Some recipes had red food coloring, which just seemed weird to me. Thankfully, the visual experience matched the taste and smell I was used to. I’m really rather impressed that my first try at making char siu came out so well!

For the bao, I used this recipe as the base, which includes prepraring the char siu filling as well as the dough for the bao. I modified the filling slightly (still for 24 buns):

  • ~ 1 lb char siu pork, cut into 1/2 cm pieces (err on the side of small)
  • ~ 2 cloves garlic, minced
  • 1/2 a white or yellow onion, minced
  • 1 scallion, minced
  • 1/4 C soy sauce
  • ~ 3 T brown sugar (I only used 2 T but I think it could have been sweeter)
  • ~ 1 T cornstarch dissolved in 2 T water
  • ~ 2 T oil

Heat the oil in a large wok or skillet. Add the garlic, onion, and scallion and saute until soft but not browned. Add the pork and saute for a minute or two. Add the soy sauce, sugar, and cornstarch mixture and saute quickly until glazed. Allow to cool before filling buns.

For the buns, I followed the recipe exactly (note, just up to step 3, then go back to the previous recipe for the filling). Instead of foil wrappers on the bottom, I might try waxed paper next time (not sure how this will stand up to steaming though, so maybe parchment paper?), because the buns are great to freeze and microwave later as a quick snack but removing the foil bottoms is a pain. Here’s the final result:

img_1264 img_1256

Unfortunately, the bao wasn’t exactly what I was hoping for – it was basically the kind of bao you would use for normal bao of the ground pork and chives variety, not the fluffy, soft bao I wanted with my sweet char siu. I think I need to look for a bao recipe that uses milk to achieve that. Then there’s also the other kind of char siu bao – baked, and golden colored, which is the kind I grew up with. I’m pretty sure that’s an egg-based bread.

I’ll definitely experiment with both kinds until I get it right, but we’re already almost out of char siu from filling the baos and using some for noodle soup. Guess I’ll need to make more of that again, too. :)

The gustatory voyage, an interlude

(Part of the Blog for Darwin blogswarm)

img_0156e

Few things make you appreciate food the way making it yourself does. One food I don’t particularly appreciate is cake – I’ll eat it, but I prefer my desserts chewy and unfrosted. So I decided to take the occasion of Darwin’s birth to temper my sweet indifference, and made him a birthday cake. Not the pour out of a box add an egg into the oven kind, but an honest to goodness full-on buttercream frosted layer cake from scratch.

d

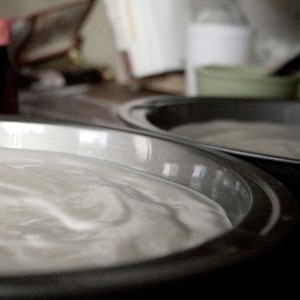
img_0140eFor this special event, I used Dorie Greenspan‘s “Perfect Party Cake” recipe – a white cake that sounded simple, elegant, and delicious. Lemon zest and lemon extract adds a special touch. For the base, I followed the recipe exactly, using buttermilk where it gave the option. While baking, however, I may have pulled the two rounds from the oven a couple minutes too soon; a toothpick inserted into the middle came out clean, but the tops probably should have been a bit springier. No matter, I popped them out to cool and set to work on the frosting.
a

Not much for frosting, and aghast at the amount of butter that went into it, I cut the buttercream recipe in half and made a batch of fresh whipped cream to substitute (not exactly healthier, but I love whipped cream and at least I don’t have to see the sticks of butter going in). I probably stopped mixing the buttercream mixture too soon before adding the lemon juice since I wasn’t sure what “thick and smooth” meant and I was getting impatient (really? 6-10 minutes of mixing?!), but afterward I was able to beat it into more of a frosting consistency (oh, that’s what thick and smooth means!). Making whipped cream is always a test of patience as well. Times like these I wish I had a stand mixer – I did a good 20-30 minutes of hand mixing for this! All for you, Mr. Darwin.
r

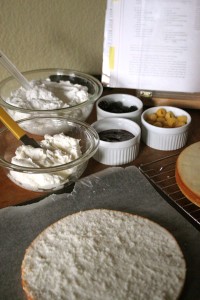
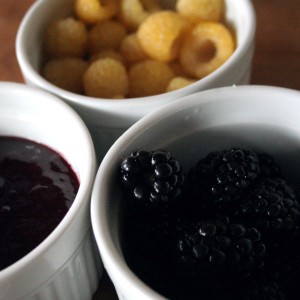
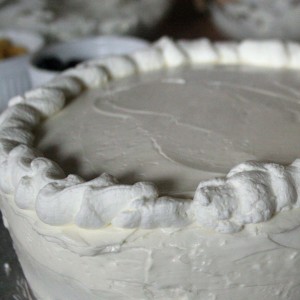
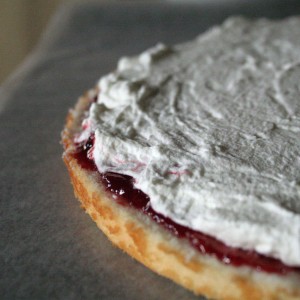
img_0142eThen came the most dreaded part – sawing the cake rounds in half. Terrible visions of lopsided, crumbled cake fragments filled my head, but I did fine. Not wanting to push my luck, I opted to leave the second round alone, as it wasn’t quite as thick. Then came the fun part – assembling and decorating the cake! Alternating cake rounds with layers of raspberry jam and whipped cream, I topped off the final round and the sides with the buttercream frosting. My first buttercream frosted layer cake! Adding another first, I tried the baker’s trick of using a Ziploc bag to pipe a border of whipped cream around the top. Now, what to put on the blank canvas? A drawing of the Beagle or a beagle? A map of the Galapagos islands? A phylogenetic tree? I settled on the birds that inspired Darwin’s theory of speciation. Finally, I finished the decoration with fresh berries, rather than coconut as the recipe suggests.
w

img_0147e img_0145e img_0150e

i
Below is the recipe transcribed from Greenspan’s book, Baking: From my home to yours, with my variations.

For the cake:

2 1/4 cups cake flour
1 Tbsp baking powder
1/2 tsp salt
1 14/ cups buttermilk (or whole milk)
4 large egg whites
1 1/2 cups white sugar
2 tsp grated lemon zest
1 stick (8 Tbsp) unsalted butter at room temperature
1/2 tsp pure lemon extract

Center a rack in the oven and preheat to 350 deg F. Butter two 9×2″ round cake pans and line the bottoms with a round of buttered parchment or wax paper. Put the pans on a baking sheet.

Sift together the flour, baking powder, and salt. Whisk together buttermilk and eggs. Put the sugar and lemon zest in a large bowl and rub together with your fingers until the sugar is moist and fragrant. Add the butter and beat at medium speed for a full 3 minutes, until the mixture is very light. Beat in the extract, then beat in 1/3 of the flour mixture. Beat in half of the egg mixture, then half of the remaining flour mixture, then the rest of the egg mixture, and finally the rest of the flour mixture, beating until well incorporated each time. Beat the batter for an additional 2 minutes to ensure that it is well mixed and aerated.

Divide the batter between the two pans, smooth the tops (you might try making a slight depression in the middle to reduce doming), and bake for 30-35 minutes, or until the cakes are well-risen and springy to the touch. A toothpick inserted into the centers should come out clean. Transfer the pans to cooling racks for about 5 minutes, then remove the cakes from the pans, peel off the liners, and let cool completely right side up.

To make the buttercream (for top and sides only):

1/2 cup white sugar
2 large egg whites
1 1/2 sticks (12 Tbsp) unsalted butter at room temperature
1/8 cup fresh lemon juice, strained
1/2 tsp vanilla extract

Put the sugar and egg whites in a medium heatproof bowl and fit it over a pan of simmering water. Whisk constantly over the heat until the mixture feels hot to the touch, about 3 minutes. Remove the bowl from the heat and beat the mixture with a whisk or hand mixer at medium speed until it is cool, about 5 minutes. Add the butter 1/2 stick at a time, stirring with a spatula. Once the butter is all in, beat the buttercream on medium-high speed until it is thick and very smooth – the consistency of frosting – about 6-10 minutes. If the buttercream curdles or separates, just keep beating and it will come together again. Gradually beat in the lemon juice on medium speed, waiting until each addition is absorbed before adding more. Finally, beat in the vanilla. Press a piece of plastic wrap against the surface of the buttercream and set aside.

To make the whipped cream:

1 cup heavy whipping cream, chilled
1/8 cup white sugar
1/2 tsp vanilla extract

Combine the cold whipping cream, sugar, and vanilla in a medium bowl. Beat on medium-high speed until stiff peaks form, about 10-15 minutes (chilling the bowl may speed up this process). You want the whipped cream to be fairly thick.

To assemble and decorate the cake:

Prepare about 2/3 cup raspberry jam by stirring vigorously to loosen.Using a sharp serrated knife and a gentle sawing motion, slice each cake round horizontally in half (if the round is at least 1 1/2 inches thick). Put one layer cut side up on a cake plate or cardboard cake round. Spread it with the jam, then cover with a layer of whipped cream. Top with another cake round, and spread again with jam and cover with a layer of whipped cream. (Repeat if you have 4 total cake rounds.) Place the last layer cut side down on top of the cake and frost the top and sides with buttercream.

To finish this lovely cake, decorate with your favorite icings, cake decorating pens, more whipped cream, fresh berries, mint leaves, chocolate curls – whatever floats your Beagle!
n
img_0155e1

Fried abalone

I have a friend who “buys a pig” every year and usually some of the rest of us get in on that, because, well, a pig is a very large animal and none of us really needs that much pork, but a quarter or a fifth of a pig does us very well indeed. So I got some pig for my household, including chops, ribs, bacon, sausage, ham, and…. abalone.

Abalone?? That’s what I said. Apparently our friend who went to pick up the meat didn’t bring enough cash with him so he found a friend of his who lived nearby who happened to have cash, a desire for pork, and, wouldn’t you know it – abalone. So our friend gave his friend some pig in exchange for cash and abalone, and that’s how we all got an abalone with our pig. As an aside, California strictly regulates abalone fishing, and one person can not be in possession of more than three abalone at any given time. So how five of us got abalone that day is a mystery – perhaps some variant of the river crossing puzzle?

At any rate, I had never cooked abalone in my life, so it seemed like a fun, exotic thing to try and prepare. Turns out it is actually very easy – we basically sliced, breaded, and deep fried it like fried calamari and ate it with cocktail sauce. Not very fancy, but it was quite good.

I followed a pretty basic recipe from allrecipes.com. It is definitely the biggest mollusk I’ve ever prepared, and rather funny looking (but that’s par for the course for mollusks).

After slicing it, I pounded it with an empty sake bottle – for lack of a meat tenderizer – until it was uniformly mushy (I read that this step is very important). Then, just dip each piece into a beaten egg/milk mixture, coat with seasoned bread crumbs, and place into a deep skillet containing about a cup of thoroughly heated oil. Fry on each side for about 2-4 minutes and you’re done!

If you like calamari or fried clams, you’ll probably like fried abalone. But I’m not sure where you get it if you don’t have a friend of a friend who happens to fish for abalone…

Chinese pan-fried pork buns

Pork buns are often overlooked by those unfamiliar with Chinese cuisine, overshadowed by the much more common dumplings, also known as “potstickers” when pan-fried. While variations for both abound (e.g. steamed BBQ pork buns, shrimp dumplings), the classic for each is very much the same – a plain dough rolled into rounds and filled with a mixture of ground pork seasoned with garlic, ginger, soy sauce, and sesame oil. Though steaming the buns is delicious, pan-frying makes them delightfully crisp golden brown on the bottom and perfect accompanied with a zesty dipping sauce.

There are two main components to pork buns – the wrappers and the filling. Dumplings can be made with store-bought wrappers (available at any Asian food store) but these buns require leavened dough, which is easy to make. I essentially use a plain recipe for French bread dough from Beth Hensberger’s The Bread Bible. The filling (recipe courtesy of my mom) is also very easy provided you can get Napa cabbage and Chinese chives. Both of these should also be available at Asian food stores.

Note that this recipe makes a large number of buns, so you should divide the recipe as needed (1 serving is probably 4-6 buns). Alternatively, you can make all the filling and freeze the portion you don’t use. The dough, however, should probably be made for the number of buns you expect to make that day.

Pork bun wrapper dough (adapted from The Bread Bible)
(makes about 60 wrappers)

2 cups hot water
1 1/2 tbsp active dry yeast
1 tbsp sugar
1 tbsp salt
3 cups bread flour (or unbleached all-purpose flour)
3 cups unbleached all-purpose flour

  1. Place the hot water in a large mixing bowl and sprinkle the sugar and yeast over the top. Mix to dissolve and let stand 10 minutes until foamy.
  2. Add the salt and 2 cups of the bread flour and mix hard with a whisk until smooth.
  3. Add the remaining bread flour and the all-purpose flour, 1/2 cup at a time, until a shaggy dough that just clears the side of the bowl is formed.
  4. Turn the dough out onto a lightly floured surface and knead until smooth and no longer sticky. Add flour as needed to prevent sticking.
  5. Place dough in a deep greased container, cover with plastic wrap, and let rise at cool room temperature for about 2 hours. You can also let the dough rise in the refrigerator for at least 6 hours; it’s best to let the dough return to room temperature before working with it.

Ground pork filling (passed down from my mom)
Makes ~ 60 buns or 100 dumplings

~ 2 lbs ground pork
the bottom half of a small Napa cabbage, finely chopped
a 4″ diameter bunch of Chinese chives, finely chopped
2 large cloves garlic, minced
2 tbsp fresh ginger, minced
1/4 cup soy sauce
1 tbsp sesame oil

Combine all ingredients in a large bowl and mix well.

Wrapping the buns

  1. Once the dough has risen, turn it out onto a well-floured surface and knead a few times until smooth.
  2. Form the dough into a flat ball, pinch a hole in the center, and stretch the dough into a uniform loop. Continue stretching until the dough rope is about 1 1/2 inches in thickness. Cut the dough into pieces about 1 inch long, dust with flour, and cover with a damp paper towel.
  3. To make a wrapper, lightly flatten a piece of dough with your palm. Roll the piece of dough out into a thin, even round using a rolling pin.
  4. Place the wrapper flat in your palm and add about a heaping tbsp full of filling in the center. Pinch the edges up into folds towards the center while turning the bun in your hand until all the edges have been pinched up. Make sure the top is sealed, and you’ve got a pork bun!

Pan-frying pork buns

  1. Coat the bottom of a large skillet or wok with a tight fitting lid with a liberal amount of vegetable oil (1-2 tbsp) and heat at medium-high.
  2. Place wrapped pork buns in the wok in a single layer making sure that they don’t touch. Fry about 2 minutes or until the bottoms are light golden brown.
  3. Add about 3/4 cup of cool water, cover, and cook over medium heat until the water has boiled off almost completely, ~ 6-8 minutes.
  4. Remove when the bottoms are dark golden brown – cook a little longer if necessary – but be careful not to burn them.
  5. Eat while hot and serve with a dipping sauce (see below) if desired.

All-purpose dipping sauce
(for dumplings, pork buns, etc)

Combine soy sauce, vinegar, and a spicy black bean chili mixture (available at Asian food stores) in about a 4:2:1 ratio. Adjust flavor to taste. Feel free to add sesame oil or ginger if desired.

That’s pretty much it! Don’t be intimidated by the seemingly large number of steps. It essentially boils down to: Make dough. Make filling. Wrap filling. Cook buns. Eat buns. The hardest part is wrapping the filling so that the result looks like a bun and acts like a bun. Believe me, it took me about 30 buns before I finally got my mom’s wrapping technique confidently down. But the hardest part is also the most fun part – aside from eating the buns, of course!

Feeding frenzy

I don’t diet, but I do think quite a bit about what I eat. This is motivated mostly by a desire to be “healthy” but I would hope not in an unhealthy way. Growing up in an Asian household with a mother who loves and excels at cooking traditional Asian dishes, this meant that I ate a lot of different kinds of vegetables, seafood, and stir-fried fare as a kid. Sure, I ate my own fair share of junk food, too – I’d demolish half a party-size bag of Doritos in one sitting and often had dinner-sized snacks (consisting of last night’s dinner) right before dinner, but I escaped becoming another obesity statistic through my devotion to Ultimate Frisbee. (I wouldn’t say genetics has that much to do with it; although my parents are both trim and healthy, it appears the well-nourished younger generation is quite capable of packing on the pounds when limited to a sedentary lifestyle.)

At any rate, my culinary tastes have changed quite a bit since then, but virtually all in good ways. I did not enjoy cheese, yogurt, or seafood a great deal in those days, but now love all three. And I still love fruits and vegetables and will try almost any dish put in front of me, courtesy of being exposed to exotic Chinese foods like tripe and pig ears at an early age. My typical route through a grocery store consists of a beeline to the meat and produce sections, with the occasional visits to dairy, juice, pasta, and baking aisles but rarely any others. Without really making a conscious choice, it turns out that I rarely eat anything that’s been processed and can count the number of times I willingly eat/drink junk food in a year on two hands (and maybe a foot). Then again, I probably eat as many or more calories now that I’ve discovered the joys of heavy cream, baking bread, and cooking with butter. Ah well.

So I’m a (mostly) healthy eater, right? Well, let’s just say that after reading The Omnivore’s Dilemma it’s apparently not that simple. That book can strike fear into the gut of even a relatively balanced eater like myself. Cows are corn. Chicken are corn. Fish are corn. Juice is corn. Toothpaste is corn. Basically, corn is the Borg and resistance is futile. Think we’re 90% water? Wrong – we’re like 99% corn. Even most so-called “organic” products and “free-range” animals aren’t the rosy sun-over-pasture image depicted on their containers. Not to mention the carbon footprint made by transporting asparagus from Argentina. Here in California, we can kind of get away with it because much of the produce in our stores are actually grown in California, and there are farmer’s markets every weekend the entire year. (Growing season? What’s that?)

But whenever you rationalize one thing about food, another bogeyman pops up. Take caloric restriction and aging, for instance. Just the act of eating – nevermind what you’re eating, though this has an impact, too – is thought to damage the body. Digestion produces destructive molecules called free radicals that can go around and beat up your cells. Some foods, like those high in antioxidants (like berries and pomegranate) help to reduce the damage free radicals inflict. But just the act of consuming calories damages your cells, which contributes to aging. When mice and worms are starved (something like 1/3 of their normal caloric intake), they live significantly longer. Although the effect hasn’t yet been reproduced in humans, the fountain of youth beckons many, and caloric restriction has become a trend as people strive to live longer by eating around 1000 calories a day. I heard there’s this one professor studying aging who claims that just looking at food causes you to age (albeit imperceptibly).

In the midst of this national personality crisis about food, I’m reading books about the joys of cooking and eating, participating in cooking and eating, and having a good time cooking and eating. Food, whether it be making it or consuming it, is one of the few things that consistently makes me happy, so I think I’m willing to forgo a potential bonus in lifespan to have what I know is good right now. After all, I’m pretty risk-averse, and while to some that would mean going caloric restricted to the max, to me it means going for the sure thing – food bliss.

By the way, here’s a delicious recipe for cold sesame noodles!

Sweet Soy Marinated Short Ribs

I’ve received two recipes for short ribs in the past couple weeks (from my mom and Euge) and gave my mom’s recipe a try last weekend. It’s super quick and easy, and, of course, delicious. I almost venture to say that they were almost as good as my mom makes. Don’t worry, Euge – I’ll try your friend’s recipe soon too, and maybe even make both at the same time at some point so there can be a rib-off!

The trickiest part of making short ribs is getting the short ribs. First of all, they don’t usually sell short ribs unless maybe if you go to an asian supermarket – in regular supermarkets you usually only find “long” ribs (~6″), and then you have to have them cut into short ribs (~2″). The tricky thing is, most meat counters close around 7 or 8PM, and by close at 8, they mean the butcher leaves at 7, and by leaves at 7, they mean you’re out of luck whenever the butcher shuts off and cleans the equipment, which is usually around 6. It’s probably also a good idea to go to a store where they sell ribs by the pound as opposed to pre-packaged from third parties, because I’m not sure if they’ll cut packages (I decided not to risk another disappointment and went to a place where they sold ribs by the pound, i.e. Andronico’s as opposed to Safeway); you’ll also get better choice and can get exactly the amount you need.

So now that you’ve got the short ribs taken care of, what do you do to them?

For 1.5 lbs short ribs (~5 servings),

Marinade:
1/4 C soy sauce
3 Tbsp vinegar
1 Tbsp ginger, peeled and coarsely chopped
2 Tbsp garlic, flattened, peeled and coarsely chopped
1-2 tsp ground pepper
1/2 tsp salt

Combine ribs with marinade in a large airtight ziploc bag and let marinate ~ 1 hr, turning the bag a few times to coat evenly.

1 Tbsp oil
1/3 C brown sugar
1 Tbsp cornstarch, mixed with 2 Tbsp water
1-2 Tbsp scallions, chopped

  1. Heat oil in a large skillet or wok and add ribs, reserving the marinade. Cook over high heat for 1-2 min, turning to brown evenly.
  2. Add the reserved marinade, bring to a simmer over low heat, and cook, covered until mostly done, about 7 min, turning ribs once or twice during.
  3. Add brown sugar and cook until reduced by 1/3 or 1/2, ~ 2 min
  4. Lower heat and add cornstarch mixture, cook until thickened, ~ 2 minutes.
  5. Add scallions during the last minute, and serve garnished with more scallions.

Beef Stew

One of the first recipes I made out of Alice Waters’ The Art of Simple Food was Beef Stew. I missed my mom’s cooking and I remembered beef stew fondly for its savory, hearty comfort and ability to be paired deliciously with thick noodles for beef noodle soup. It was a rousing success the first time and now that I’ve made it three times I figure it’s definitely something to blog home about! If you like it as much as I do, the best part is that it makes plenty for leftovers. So here, paraphrased from Alice Waters, is a very simple recipe for Beef Stew. This might be illegal… maybe?

  • ~3 lbs beef chuck, cut into 1-2 inch cubes and seasoned with coarse salt and fresh ground pepper
  • 4-6 strips of bacon, diced
  • 2 tablespoons oil
  • 1 1/2 cups red wine
  • a couple tablespoons brandy (optional)
  • 2 or 3 each of carrots and parsnips (optional), chopped into large pieces
  • 1-2 medium onions, quartered
  • a couple sprigs each of thyme, parsley, rosemary/savory
  • 4 whole cloves, each stuck into a quarter of onion
  • 2 star anise
  • a couple peppercorns
  • 3 tomatoes, diced
  • a small head of garlic, peeled and coarsely chopped
  • ~4 cups chicken or beef broth
  1. Heat the oil in a heavy skillet or wok and cook bacon until fat is rendered and bacon is lightly browned but not crisp. Remove bacon.
  2. In batches, brown the beef on all sides in the bacon fat and transfer to a large pot.
  3. Pour off most of the fat from the skillet and cook the carrots, parsnips, and onions with the herbs, anise, and peppercorns until lightly browned. Transfer to pot with the beef.
  4. Add the brandy to the skillet if using, and the red wine. Scrape up any browned bits from the skillet and boil the wine until reduced to 1/3. Pour over the beef and vegetables in the pot.
  5. Add the tomatoes, garlic, and broth to the pot. The liquid should come up at least 3/4 of the way up to the top of the beef/vegetables; add more broth if needed. It does not need to cover the ingredients entirely.
  6. Cook at barely a simmer for 2-3 hours or until meat falls apart when tested with a fork. Season to taste with salt and serve over rice.

Gong xi fa cai

I celebrated Chinese New Year yesterday with a bunch of friends from school, hosted at David’s apartment. I volunteered to make dumplings, so I prepped the filling and brought over some equipment since I figured (accurately) that David’s place would be too small to handle that many cooks in the kitchen. Unfortunately, I forgot my packs of dumpling wrappers that were thawing in the fridge, so we only had the 60 or so wrappers that I had him buy for me; fortunately, that turned out to be just the right number, and now I have wrappers at home to make fresh dumplings with the leftover filling whenever I want.

This led me to my first revelation: pre-made dumpling wrappers rock. I tried to make my own dough before, and there were some problems – hint: always add flour to the liquid ingredients, never the other way around!, and a fat rolling pin does not for a skinny rolling pin substitute. It turned out ok that time, but I’ve concluded it’s not worth the effort for most dumpling occasions. Plus, the wrappers you can buy are just the right ratio of dough to filling and cook in about 3 minutes. The only problem I can think of is that you need to pay more attention to how much filling you wrap, because if it’s not enough, the dumpling can get all floppy when cooked with too much empty space inside.

At any rate, the dumplings were a big hit, and a lot of fun for people to make as well. We had about 4 or 5 different styles going on – my simple but 2 fold style, the more elaborate 6 fold style you see in dim sum a lot, a russian style, and even a bao zi (steamed bun) style, which actually looked really cool. Maybe one of these days I’ll get really ambitious and attempt xiao long bao (soup dumplings).

Aside from dumplings, we had two big pots of huo guo (fire pot) going, and tons of stuff to throw in them – beef, pork, chicken, shrimp, cuttlefish sticks and fish balls; fried and soft tofu, mushrooms, rice noodles, and about 5 different kinds of vegetables, 3 of which I didn’t recognize. In traditional Chinese fashion, there was a ton of food, perfect for the new year.

My second revelation was that people can have full Chinese ancestry and not like soy sauce or spicy food, not be able to pronounce Chinese words, and not own a rice cooker. Well, let’s just say I’m still a little skeptical that he is truly Chinese.

Here is the recipe I use for dumpling filling, passed down from my mom (who is the best Chinese cook I know):

2-2.5 lbs ground pork
bottom 1/2 of a napa cabbage, chopped fine
~ 3 inch diameter bunch of green/garlic chives (long and flat, not the small wispy ones), chopped fine
3 large cloves garlic, minced
~ 1 cubic inch of ginger, peeled and minced
1/4 C soy sauce
1 T sesame oil
1-2 T vinegar

Mix all the ingredients together in a large bowl with a sturdy utensil.

To wrap dumplings, prepare a bowl of cornstarch mixed with water (about 1/2 T to 1/2 C water). Place a wrapper flat on the palm of your hand. Place a small ball of filling in the center, about the size of 1 tablespoon. Dip a finger into the cornstarch solution and wet the top edge of the wrapper. Bring up the bottom half of the wrapper and pinch shut at the top in the middle. Wet the front sides of the wrapper, then start folding up the front part of the wrapper up towards the middle, pinching the top closed as you go. You should have 1-3 folds (depending on your style) on each side on the front of the dumpling, with a slightly curved shape that helps it sit upright.

To cook dumplings, bring a large pot of water to boil. Place about a dozen dumplings in the water. When they pop up to the surface, pour in a cup of cold water. Wait 1 minute, then remove from the pot. They’re done!